
Here is a sneak peak at the upcoming workshops for 2023 Mid-Atlantic Mod!!!
Please note that you will not pay for the class at the time of registration (it will say the ticket is free), but there is a cost of $15 (+ some workshops have a materials fee) that is payable in cash at the time you sign in for the weekend. ***Please note: Shari's bag class is slightly longer (2 hours) and therefore $20. *** You may not cancel after April 1 and you will not be admitted into MOD until you have paid for all the workshops you signed up for, so please have your cash handy.
Registration for classes will open on February 19, 7 PM eastern.
Friday Classes:
9:30 -11:30 AM Boxy Bag with Shari van der Grijn

Supply list
- 34 x 24.5 quilted panel
- 1/2 yard fabric for straps
- 1/4 yard fabric for binding (interior seams)
- 24” Separating zipper
- 4” x 20” Soft and Stable or Fusible Fleece
- Wonder tape (optional)
Approximate supply cost: $0-15
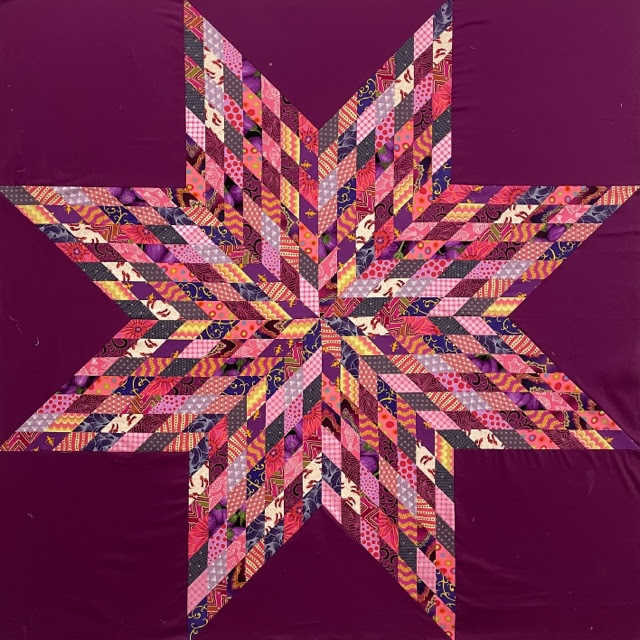
12-1:30 PM Jelly Roll Lone Star with Sarah Bond

Description
The Lone Star is one of the most dramatic of all of the traditional quilt forms. In this class, students will learn the basics of strip piecing a Lone Star from a jelly roll, including how to assemble the strips, how to cut and match the 45-degree angles, how to check for and mitigate problems so that the finished Lone Stars will go together and lay flat. Then we’ll cover how to lay in the background to finish your quilt top. Suitable for all levels, but students who like a bit of precision and craftsmanship will have the most fun!

Looking forward to seeing you all in class!!!
Supply list:
- Machine in good working order with ample thread and spare needles.
- Standard sewing supplies such as pins, shears, rotary cutter and at least 18x24 inch cutting mat, 24 inch ruler.
- Pencil or pen and notebook for taking notes.
- One Jelly Roll with 40 2 ½ inch strips, selvage to selvage
- 2 yards of background fabric
Approximate supply cost: $50-60 or use fabric from stash
2-3:30 PM Textured Stripes with Janet Schoenfeld

Let’s talk about your fabric life. Would you like to de-stash a bit? Play with colors? Different fabrics? Some textures? I can help. We will make some amazing blocks that will have you looking at your stash in a new way.
You will learn how to make striking, angular blocks using a mix of strips from your stash. Blocks can be arranged in several ways to make your quilt your own.
Before class:
Using fat quarters or scraps, pull together a mix of fabrics that include blender prints, Essex linen, low volume prints, and solids; making sure you have a mix of light, medium and dark fabrics.
Cut strips 21 inches long of varying widths (1-3 inches). You will need 12-15 strips to create a 20” x 20” panel that will later be cut into pieces to make 2 blocks. Cut 35 strips total so you have enough to make two panels.
Next, sew strips together before class for one panel, by pairing and sewing strips together that have some contrast between them. Continue by sewing the pairs together in a random order, until you get to a 20 inch width.
During class, we will:
Discuss how color and contrast can provide impact to your blocks.
Cut panels into pieces, play with arrangements & learn techniques to improve your precision when piecing seams w/bias edges.
Sew blocks together and discuss what worked well with the first block and what you would try next when making the next set of blocks.
Approximate supply cost: Use fabrics from your stash or 4-5 fat quarters (roughly $15)
Fabric Pull Ideas

Supply list:
- Fabrics can be strips from your stash, or if you prefer, 5-6 different fat quarters, cut into (35) 21-inch-long strips with a range of widths between 1-3 inches.
- Sewing machine
- 24-inch ruler (I’ll have a few on hand)
- Pins and a glue pen to help with bias seams (I’ll have a few on hand)
4-5:30 PM Selvedges with Anne Brill

Do you ever save your selvedges? Do you have a growing collection but don’t know what to do with them? Make something fun with your selvedges! We will play with selvedges and create fabric using these colorful edges, turning them into a small sewing accessory. In this make-it-and-take-it workshop, we will make a pincushion and you will be shown examples and given patterns to make other items in the future. They make great gifts for your sewing friends.
Supply list:
- Selvedges: Start saving your selvedges now! Ask your friends to contribute to your selvedge stash. Cut them any length but at least 6” long and about ½ to ¾” into the fabric beyond the selvedge. Bring selvedges that you like according to colors or words or both. (Some selvedges have fun words and inspirational sayings.) Bring some extras to trade with others and I will also have some available for you to use. You will need 10-20 selvedges to work with. Press selvedges flat before class.
- Foundation fabric: muslin fabric, about 6-8 inches square
- Backing fabric: This will go on the back of your pincushion, about 6-8 inches square, any fabric of your choosing, cotton or linen.
- Sewing machine
- White or cream-colored thread
- Sewing tools (scissors, pins, etc.)
- Small cutting mat & rotary cutter - optional, we can share
- Note: I will provide crushed walnut shells for filling pincushions
Approximate supply cost: $0-$10
Saturday Classes:
10 - 11:30 AM Bag Hardware with Linda Fasules
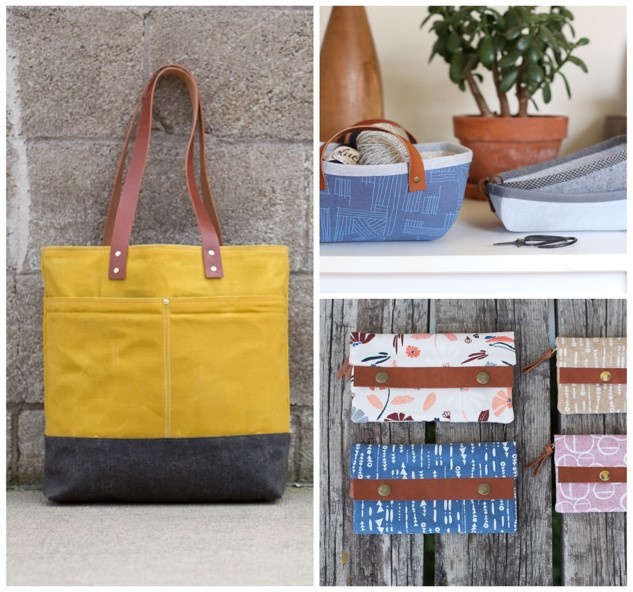 |
| Photos from Noodlehead (clockwise): Wax and Wool Tote, Tiny Treasurers Basket, Minimalist Wallet. |
Bag hardware can be both beautiful and functional. In this workshop you will learn:
- How to add rivets and snaps to your bags to give them a fun and professional look.
- Other hardware that is available to use for different types of bags.
- Ideas for adding leather, or leather-like, details to your bags.
When I started making bags, finding the correct size hardware for my projects was very confusing. I couldn’t find hardware locally and bought a lot of things online that did not work. Let me make that part easy for you! I will supply you with 50 rivets and 12 snap sets in the metal finish of your choice and the tools you need to apply them. You will learn how, when and where to use these fasteners. We will also talk about the use of magnetic and plastic snaps, turn or flip locks, swivel clasps, etc.
This is a non-sewing class, but if you have a bag or other project that you would like to add snaps or rivets to, please bring it! I will have a large assortment of bags to show for ideas and inspiration.
Supply list:
- Hammer or mallet
- Fabric scraps
- Optional:
- Leather hole punch
- Leather or cork scraps
- Bag you would like to add hardware to
Kit cost for this class: $25 fee includes rivets and snaps and their respective setters. This is not optional. You will choose in advance which metal finish you would like to have: Nickel, gold, antique brass, or my current favorite - gunmetal.
12-1:30 PM Diamond Color Story with Sarah Bond

Description
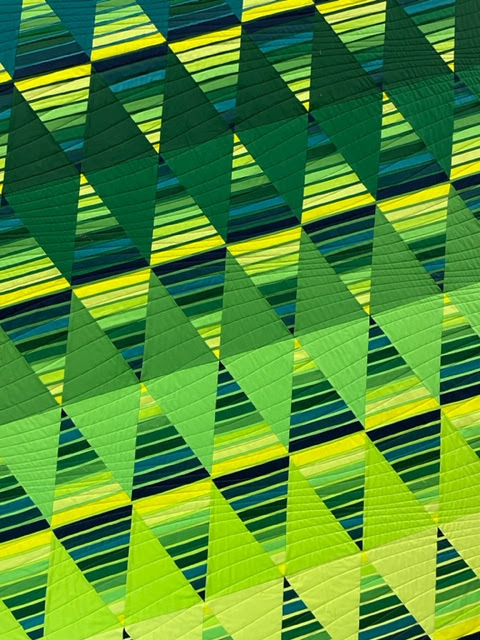
This class is all about playing with colors and color stories. Color play is how I’ve learned most of what I know about color. How do colors play on the eye, depending on how you arrange them and what your decision variables are? Are you arranging the colors based on high contrast? Based on low contrast? Based on a gradation from one color family to another? How does the background color affect how the color is perceived? What happens when you interrupt the color story? The diamond shape is merely infrastructure for building your own color story.

This particular example is a color story about gradations. Some of the gradations represent value steps from one shade to another on a color progression. Light blue to dark blue. Red to purple. Others are more fanciful, with a progression from green to pink.
Supply List
Fabric for your diamonds:
The sample quilt uses sixty different solids, in one-eighth yard selvage to selvage cuts of each color. If you want to follow this sample you’ll need to choose your gradations and get your 1/8 yard of six gradations of ten. If you want to devise your own color story, you’ll need that equivalent of whatever colors you decide to work with. I’m currently working on a design with just ten colors. If you want to focus on just ten colors, you’ll need about ¾ yards of each color.
Fabric for your background:
The above sample uses two yards of Kona Snow and two yards of Kona Ash. I like to have some variation in my background colors, even if very slight, to add a little dimension to the quilt. I chose to pull the background through the colors in a narrow strip to interrupt the color progression. You could also use four yards of a single background fabric.
In addition to your fabric, you will need a sewing machine in good working order, basic sewing supplies, thread, ruler, rotary cutter and cutting mat.
Skill Level: This class is suitable for most skill levels. The class involves basic foundation paper piecing. Some experience with paper piecing is helpful but not required.
Preparation before class: Students can precut their strips for the class if desired. The sample was made with two 1 ¾ inch strips each of sixty different colors. Another option would be to lay out ten colors in a gradation. This quilt has 10 colors. Each row uses nine of the colors in the half diamonds and a tenth in the background and spacers. The same set of colors show up differently depending on the background used. I used one yard of each color and had a bit left over.
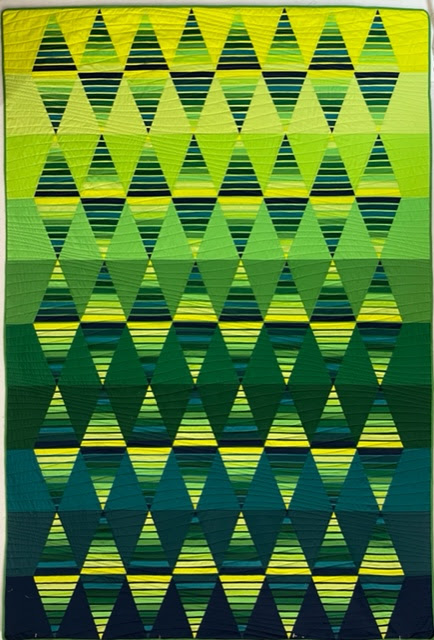
This one was lots of fun as well. It came out larger than the quilt above, finishing at about 65 by 90.
Approximate supply cost: $50-60 or use fabric from your stash
2-3:30 PM Modern Organic Shapes with Jess Levitt
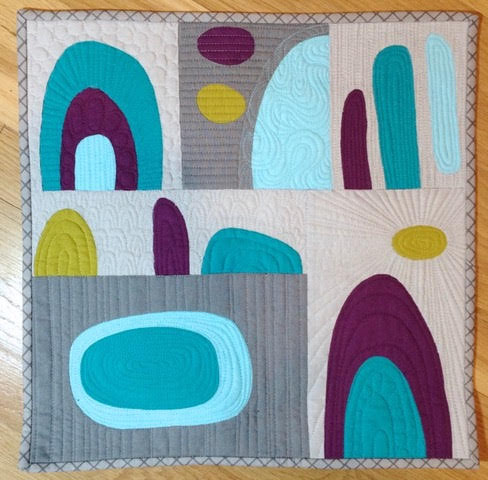
In this workshop you will learn the basics of machine reverse-applique with glue-basting. Organic shapes are imperfect, curved, “natural” shapes that we will draw by hand. You will start on a mini quilt and we will include a quick discussion of composition. This technique can also be used to sew precise curves and circles by machine and we will discuss how to apply it to other types of quilts.
Supply/tools list:
- Minimum of 2-3 fat quarters that can be used together (At least one should be solid or blender to be used as a background. You can bring plenty of scraps or small yardage to have options)
- Freezer paper (can be bought in grocery store)
- Paper (copy paper or notebook)
- Pencil, eraser and thin Sharpie
- Spray starch (I find regular works best, but alternatives like Best Press can work OK too) (Can be shared by students)
- Small paint brush
- Elmer’s Washable School Glue (other basting glues are OK)
- Small, sharp scissors
- Pressing cloth or scrap fabric that you don’t mind getting starch on
- Sewing machine (don’t forget the cords and presser foot!)
- Thread and pins
- Removable marking pen or chalk
- Rotary cutter and cutting mat (for trimming blocks)
- Useful but not required:
- Iron and pressing mat/board (could use shared ones in the classroom, but it’s very helpful to have your own)
- non-stick ironing mat (mine is fiberglass)
- zipper foot for your machine
- Stiletto or pointy pressing tool (to keep you fingers away from the hot iron)
- Light “box” for tracing or bright light and clear quilting ruler
Approximate supply cost: $0-20 depending on what you already have on hand
4-5:30 PM Pillow Finishing with Lynne Mackay-Atha

Too many mini-quilts? Make pillows instead! They are great gifts and with zippered backs the covers can be changed out easily. The zipper can be concealed so that it is not noticeable, or it can be a design element with contrasting bands of color or patchwork.
The hands-on portion of this class will guide students through making a zippered pillow back. At the end I will show samples of three ways of attaching the back to the front: plain knife edge, with binding, and with piping. Along the way you will learn little bits of wisdom about sewing corners and selecting pillow form sizes.
Supply list:
- Fabric for pillow back - at least the size of the front plus 4 inches in one dimension.
- Pillow front - This could be a mini-quilt, but also consider an orphan block, quilting practice piece, or fabric that you love. It is nice to have the pillow front for the class, but if you just want to learn the technique, you won’t need a pillow front.
- Nylon zipper at least as long as the dimension that you wish it to go. It will later be cut to the proper size.
- Optional: stabilizer for the back fabric - this could be SF101 or fusible fleece. Sometimes I also quilt the backing fabric.
- Sewing machine and the usual kit including pins or clips and a chalk or wash away marker that will show up on your fabric. A zipper foot (and the appropriate stitch plate) is helpful.
No comments:
New comments are not allowed.